
How to Paint from a Photo
Creating a painting from a photo is a great way to turn a favorite photograph into a unique work of art. It is also a great way to improve your skills as an artist, as it allows you to focus on the technique of painting without having to worry about drawing the subject accurately. It can also be a fun and rewarding creative project for anyone interested in art, regardless of their skill level. In this article, we'll go over the steps for creating a painting from a photo, including the materials you'll need and some tips and techniques to help you get started.
Materials needed:
The photo you want to paint:
The first step in creating a painting from a photo is to choose a reference photo. This should be a high-quality photograph that you love and want to turn into a painting. It's important to choose a photo that has good lighting, composition, and detail, as these will all be important when creating the painting. If you're not sure which photo to choose, you can always start by painting a simple still life or a landscape.
Canvas:
Next, you'll need a canvas to paint on. Canvases come in a variety of sizes, so choose one that is appropriate for the size of the painting you want to create. You can also use other surfaces such as paper or board, but canvas is a popular choice because it is sturdy and has a nice texture for painting.
Acrylic or oil paints:
Acrylic paints are a popular choice for creating a painting from a photo because they dry quickly and are easy to work with. Oil paints, on the other hand, are slower drying and require more time to work with, but they are known for their ability to create rich, vibrant colors and textures. Choose the type of paint that you feel most comfortable working with.
Brushes:
You'll need a variety of brushes to create your painting, including small, medium, and large brushes for different areas of the painting. It's also a good idea to have both round and flat brushes to give you more control and versatility.
Other supplies:
You may also need other supplies such as a palette, easel, and turpentine or paint thinner (if you are using oil paints). You may also want to have a palette knife, and some rags or paper towels on hand.
Steps for creating a painting from a photo:
- Print out the reference photo: Before you start painting, it's a good idea to print out a copy of the reference photo. This will allow you to see the details more clearly and have a reference to work from as you paint.
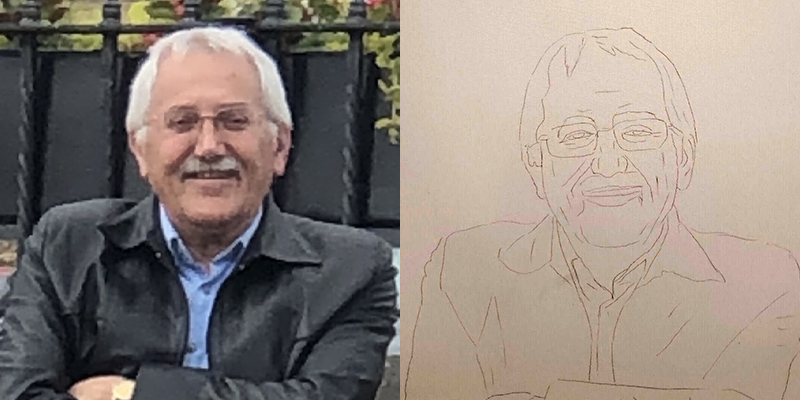
- Get the basic outline of your image onto the canvas: This doesn't have to be perfect, as you will be refining it as you go along. There are a few different ways to transfer the image onto your canvas or paper. One method is to use a grid system, where you draw a grid over the photo and then draw a corresponding grid on your canvas. Then, you can fill in each square of the grid on the canvas with the corresponding colors from the photo. Another method is to use a projector. This can be especially useful if you're working on a larger canvas. Simply project the image onto the canvas and trace the outline with a pencil. Whichever method you use, you should end up with the basic composition of the painting on the canvas. This will help you get a sense of the overall layout and proportions of the painting.
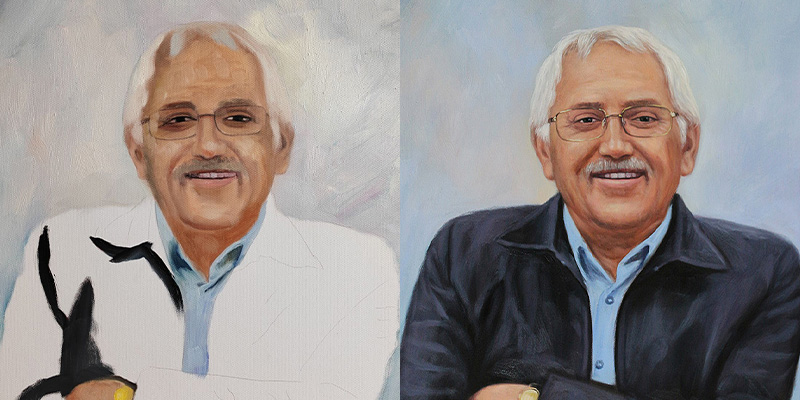
- Block in the basic colors: Begin by blocking in the basic colors of the painting. This means filling in the large areas of color with flat, solid blocks of paint. Don't worry about getting the colors perfect at this stage, just focus on getting the basic structure of the painting in place. As you paint, be sure to take breaks and step back to look at your work from a distance. This will help you see the overall composition and make any necessary adjustments.
- Add the details: Once the basic colors are in place, you can start adding the details to the painting. This might include adding highlights and shadows, blending colors, and adding texture. Use smaller brushes and add in the finer details of the image, such as the texture of fabrics or the wrinkles on a face.
- Finish the painting: As you near the end of the painting process, you can start to refine the details and add any final touches. This might include making any necessary adjustments to the colors or adding any final details to the painting. Once you're happy with your painting, it's time to give it a final coat of varnish to protect it. You can use either a gloss or matte varnish, depending on the effect you want to achieve. Once the varnish is dry, you can frame your painting and display it proudly!
Final thoughts
Creating a painting from a photo can be a time-consuming process, so it's important to take breaks and give yourself time to rest.
As mentioned previously, remember to step back from the painting to ensure the composition looks right as a whole and not just from close-up as this will generally be how the painting is viewed.
Or if you like, we are more than happy to paint your photo for you. Our artists have been trained for over 10 years and are masters of their craft and we would be delighted to turn your photo into a beautiful oil painting.
Have a look here at the photos that our customers have had painted:
Customer paintings
Or, start today by sending us an enquiry to Contact Us